Paint, Paint, and More Paint!

Our newest lesson in Home Ownership 101 has been how to pick paint colors and how to paint a room. Although we’ve picked paint colors before and painted before, never before have we had to do it for a whole house.

Tips for Picking Paint Colors

Step 1: Pick a color scheme and overall feel that you want for the room. Wall colors make SUCH a big difference in the room and we never realized it until yesterday when we painted the master and guest bedrooms. Before, the walls were basically a primer and the room felt empty and cold, not “homey” at all. Now, it feels so much more cozy and more like a bedroom… except for the fact that they’re missing beds :). We wanted the walls to be a neutral so the bedrooms are calming and inviting. Also, we can switch around the bedding without having to repaint the room every time.

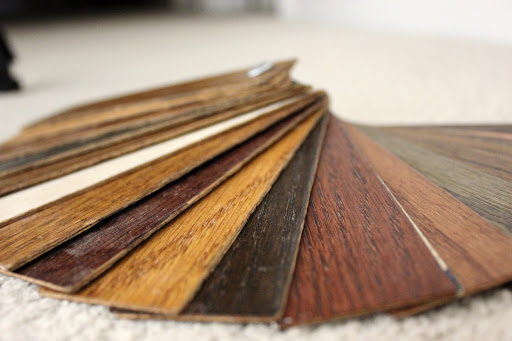
Step 2: Research colors. First, pick a color that you think you want. Then, find several different versions of that color online (or in color swatches at your local paint store). Once you have a few you like, “Google” them because I bet you someone has already used that color and posted a picture of it online. You can get a really good feel of how it actually looks on full walls before making it official on your own walls. Another good idea is to use a website that let’s you visualize the color in your own room. Sherwin Williams has something called a Paint Color Visualizer which lets you upload a photo of your room and then place the color you like on the walls. It’s super helpful!

Step 3: Bring home a few samples. Paint a patch of each color on your walls so you can see how it looks in the room.

Step 4: Choose a color! This step says it all. Now that you’ve done your research, you should be pretty confident that the color will look good in the space. And, if you totally hate it… no need to worry, just paint over it! 😉

Tips for Painting a Room

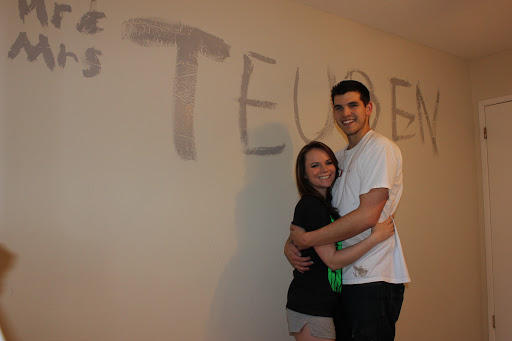
We HAD to paint Mr & Mrs Teuben 

Step 1: Cover the floors. This is super important. Make sure you buy a tarp or plastic to cover all of the floors in the room. I can’t tell you how many times we dropped a paint brush, stepped on the paint can cover, or who knows what, and were saved by the plastic! We would have paint alllll over the floors if it weren’t for that!

Step 2: Tape the doors, windows, and baseboards. We were able to avoid this in most places because I’m a perfectionist and am able to paint a pretty straight line. But, if you’re not as big of a risk taker as I am (ha! this is probably the only risk taking I really do…anywhere), then definitely tape away. We love the Frog tape found at Home Depot. The paint didn’t seep under it like the blue tape or other brands normally do. Just make sure you really get it in the grooves of the walls so it doesn’t sneak under. That’s one of my fears with tape. Some people are a little too trusting and just go crazy painting all over it and that runs the risk of seeping completely under the tape and you wouldn’t know until it’s removed and dry. Just make sure you get good quality tape and realllllly push it down.

Here’s us breaking our own rule. We didn’t realize until after this room that we should have been doing the corners and borders first.

Step 3: Paint the corners and borders. Most people want to throw the roller on the walls because you’re feeling like your accomplishing something but really, you should be painting all the wall borders first. That way, when you do start using the roller, you can even out the paint and you can get rid of that lined paint brush look.

Ready to roll!

Step 4: Roll away! When you’re buying rollers, pay close attention to the texture of your walls. The more rough of a texture, the more fluffy the roller needs to be… or as the experts call it “nap length.” Once you start rolling, try not to get too crazy at the top or bottom of the walls. The worst feeling is hitting the ceiling with your roller (which we are guilty of) because now you have to touch up those areas.

Step 5: Touch Ups. Walk around the room and look for any areas you might have missed. For walls that are more rough, you may have to go around with a paint brush and get the little areas that couldn’t have been covered with the roller. If the paint is a lower quality, you may have to do a second coat.

Note: CJ is only wearing one sock in this photo. He stepped in a big chunk o’ paint earlier.

Step 6: Clean Up. Make sure you soak any brushes used so you can use them again in the future, clean up the floor covering, take off the tape, and do what you need to do to make sure the mess is gone. 🙂

Stubborn Bricks

CJ mentioned a few days ago that he was working on getting rid of all the bricks in the backyard that made up the planter that assisted in the termite invasion. Well, it turned out to be much harder than anticipated because the bricks DO NOT want to break apart and the previous owner dug quite a hole in the ground when he started the brick layers. There’s at least 2-3 layers of bricks below the surface.

so many bricks!!

my adorable husband

working hard

pretending to be handy with the intense rotary drill

He did a lot of damage yesterday but he anticipates there will be 2-3 more days of working on it before it’s completely done. 
Once this is finished, we’ll paint the bottom part of the house that was covered by the bricks and clean up the area around it. Our backyard will definitely be one of our summer projects!

Choosing a Floor Stain

The floor had its initial sanding on Thursday. We stopped by the house to see how it looks and the old and new boards have blended together. We can’t tell which ones are new and which ones have been there for ever; they all look exactly the same.

Unfortunately, the Floor Guy came back yesterday to do the second round of sanding but the floor still had too much moisture in it to continue working on it. Because the heater was broken so long, a lot of moisture got in the boards so it’s taking longer than expected to warm up and dry out.

He decided to come back this morning with a team of 10 men (seriously) to whip it out quickly. BUT, yet again, the floors are still not dried out and some boards buckled overnight. So. incredibly. strange.

Because of that, he thinks that there’s still A LOT of moisture so he wants to wait until Wednesday/Thursday of next week to start up the work again. Yet another delay but for a good reason. We’d rather wait until the boards are completely warmed up and dried out so it won’t buckle 6 months from now than rush through the process.

Our floor stain choices

In the meantime, he dropped off some floor stain samples for us. We can choose 2 that we like and he’ll stain a few boards on our floors so we can see what they look like before we chose the final one. We’re going to check out the samples in the house to see which look the best. We want the color to coordinate with the cabinets but not be the same exact color. This is just as hard as choosing paint colors because you never know how it will really look until the whole thing is done. So we’ll just have to cross our fingers and hope we made a good choice!

By the way, I’m going to try to be better about taking photos with my fancy camera instead of my iPhone. The quality is soooo much better (obviously).

Stocking Up

Lately (probably because we’re getting closer to the house finishing) I’ve been thinking about our first Costco run. We will literally be starting from scratch so we’ll need to stock up on all the essentials like toilet paper, paper towels, cleaning supplies, food for the pantry, etc. Seems like it will be an expensive run.

I tried to find a good list online of what we should think about needing but I was only semi-successful. Martha Stewart posted this list on her website but it doesn’t seem like a list of essentials for a pantry. Who really needs anchovies and dried porcini mushrooms? Not me.

Here’s another list that’s more helpful than Martha – What Every House Needs. This lists items for the whole house and thankfully, we’ve received a lot of our essentials as wedding gifts. The only thing this list doesn’t cover is essential food to stock up on.

Here’s what I’m thinking we’ll need to start:

  1. All-purpose cleaner
  2. Toilet paper
  3. Paper towels
  4. Broom
  5. Swiffer
  6. Dish washing soap
  7. Detergent

I’m kind of tempted to wait to stock the pantry until we actually need that stuff – like flour, sugar, pasta, soup, etc. But then there’s the basics like ketchup, mustard, milk, eggs, butter. Do we wait on that or stock up on that too?

What would you recommend we include in our first run?

Hi Hoe, Hi Shovel, Bye Brick

With the sample spots applied to the walls of the three rooms we decided that the colors were just too light. So back to the paint store CJ went again this time with what we were sure would be good colors…The color for the master bedroom came out something of a goldish color and since we aren’t into the whole “living like kings in our solid 24k gold room” we decided we will try again on that one. The new color we chose for the guest room may have a little too much blue in it but we still are not 100% sure because the light was still out in that room. But the new color chosen for the office was great. So we’re .3333333333 for color choices now (two left), and I will be heading back to the paint store for round three tomorrow.

The kitchen continues to improve little by little. Most of the granite tops are now on the existing cabinets except for the cabinet we are still waiting for. It’s beautiful. The oven is also in so we’re thinking about baking a cake or something. I mean we don’t really need all the other stuff in the kitchen, right? We also have a sink so someone can clean dishes (we cook, you clean…pleeeaase). Although you’ll have to bucket-in the water because we’re short a faucet.  The kitchen is also being re-textured and painted this week.

The heater was finally fixed on Monday so the floors can now acclimate and then be sanded to a nice baby bottom smoothness later this week.

Now for the small bites. The contractors were working on installing an outlet over the fireplace to plug in the tv, and they found some termite damage on one beam. ARGHHHHHH! They tore out a little further and didn’t find much more thankfully. So with the beams replaced and wall stitched up, I had some work to do in the backyard. Apparently the little devils were sneaking in through the large brick flower bed that was behind the house. So, of course that means bye bye bricks. It took me one evening to tear out all the man eating plants growing in the bed. And then today I knocked most of the bricks out with one fell swoop of my mighty, borrowed, SLEDGE HAMMER, thanks to Bob.

Tomorrow will bring the end of the bricks and some new colors to the bedrooms, as well as a daring sweatshirt rescue, Emily left her jacket at the house. Current casting calls for supporting painters, brick movers and general lookie-loos are now open. Appointments and final decisions will be made next year, I mean month, I mean week. It’s off to work we go.

Leaves EVERYWHERE!!!

We just stopped by the house to pick out paint colors for the rooms. So far, we’ve decided on colors for the two bedrooms and office. Here’s what we decided:

Master Bedroom: Heritage Hills (Light tan)
Guest Bedroom: Nimbus Cloud (Light gray)
Office: Tantalizing (Cream)

They’re all basic colors but will definitely give the rooms more warmth than the ivory shade that they are right now. We’re also going to replace the baseboards so that’s going to make a HUGE difference in the rooms. We’re so excited!!

As far as why our blog post was titled leaves everywhere… The large tree has taken over our front yard and there’s now an uncontrollable amount of leaves. Hence our open invitation to anyone who is a fan of yard work, we can always use your help!

Here’s a photo of our beautiful little house getting consumed by the leaves. Oh, and there’s my adorable husband.

Sidebar

As you might remember, a few days ago were were trying to decide whether or not to keep our island. The decision has now been made! After standing in the kitchen and trying to imagine each possible combination, we’ve decided that the best layout would be to have the cabinet on the side to the right of our pantry.

We hope to have many get-togethers at our house and anyone who entertains knows that people tend to gather in the kitchen. With an island in the middle of our kitchen, there just wouldn’t be enough space for some to stand and for others to cook at the same time. We would end up having the shimmy past each other to keep the ball rolling on the food preparations which isn’t ideal. We want the space to feel open and comfortable and the best way to achieve that is to have the side cabinet.

As disappointing as it is to give up my little island, I know it’s for the best and I’m actually really excited for the new set up. When we were initially designing the kitchen, I kept thinking to myself, “I really wish we could have some glass cabinets to put our wine glasses on display.” That really makes kitchens look that much more beautiful and I’m glad we’re going to have that now. I think it will really complete the look.

We’re stopping by the house this afternoon and will take some pictures to update you on the progress. Our bedroom furniture has arrived so we’re going to try to bring it to the house. The recessed lights were installed in the kitchen this week, hardwood in the kitchen (where the beautiful linoleum used to be) was added, and the fan in our entertainment room was replaced.

Oh, and I must have jinxed us – right after I posted last night, the hot water heater broke AGAIN! So the plumber is here fixing it right now.

Heat is Overrated

Today marks our 1-week anniversary of not having heat in the house. We’d be more bothered by it if we were living there and had to experience the cold first-hand but luckily, we’re only reminded that it’s broken when we pop by the house for a quick check-up and have to thaw out our hands when we hop back in the car.

The biggest downside is that the floors are now on hold until the heater is fixed. According to the Floor Guy, he can’t sand the floors and start refinishing them because the hardwood needs to be adjusted to the temperature that the house will regularly be at. Or something like that. So we had the Heater Guy come over on Wednesday to take a look at The Situation and the consensus was that our motherboard needs to be fixed. Sounds intense, right? Apparently, it’s easier to replace the motherboard than to investigate what part of the motherboard has stopped working. The part has been ordered and should be arriving on Monday. So until then, no heat and no new floors. Bummer.

What’s funny (not really), is that my parent’s water heater broke at the same time as our heater! I never realized how dependent I was on hot water until it was temporarily gone. While CJ was at work basking in the luxuries of hot water in his office on New Years Eve, I was stuck living in the 1700s for a day. No dishes got done and, if I was determined enough to bathe at the house, I had to heat up water on the stove and carry it over to the bathtub. Needless to say, I went over to a friend’s house to take a shower (thanks Steph!) as I’m all about being efficient and heating up 15 pots of water for a bath was not worth it in my mind. Here’s a photo of one of her adorable puppies greeting me on my way out after the shower.

Luckily, the water heater was fixed by a jolly Water Heater Guy and we are back in business. One down, one to go!

Happy New Year!

We’re a couple days late on the “Happy New Year” message but we were busy relaxing and enjoying our time off. For our New Years Eve celebration, we stayed in our sweats, made dinner, and just relaxed. Anyone who knows me knows that it’s impossible for me to stay awake when I’m on a comfy couch and especially when I’m wrapped in a blanket. But, CJ made sure I was awake for the ball dropping. 🙂 Next year, we’re hoping to have more of a celebration (maybe in our house??) but we were so caught up in the holidays and house stuff that we didn’t get around to making plans this year.

As the house renovations move along, I can’t stop thinking about our kitchen table and chairs that we ordered. I am so absolutely in love with them and cannot WAIT to see them in the space. We ordered them a week and a half ago and they are supposed to take 4-6 weeks for delivery. Here’s the website photo of them:

When we started looking for tables, the two most important factors were that it coordinated with the rest of the kitchen and that we had the ability to entertain large groups of people.

This table has the best of both worlds. The table top and the chair seats almost match the cabinets perfectly which will really bring in that deep wood color into the half of the room that doesn’t have any cabinets. At the same time, we love that the rest of the table is white which will brighten up the space.

As far as being able to entertain large groups of people, this table has TWO leafs! This was the hardest to find in a table because a lot of these types of tables either (1) don’t have a leaf or (2) are ridiculously expensive. We first found this color scheme in a furniture store and fell in love with it but it was a round table and didn’t have any leafs. We were so disappointed but determined to find that style with the leafs. We searched on what seemed like dozens of websites and furniture stores until we came across this one. You just have to be patient and search until you find a piece of furniture that has what you want at a good price.

One skill we’ve learned when looking for furniture is if you fall in love with something at Pottery Barn, Crate and Barrel, or another “big name” store, find out who manufactured that piece of furniture. Chances are, you can buy it directly from the manufacturer at a much lower price!! Who knew??

Do you have a piece of furniture in your house that you are madly in love with? What makes it so wonderful?

To Island or Not to Island?

Our contractors brought in the island today and we’ve discovered that it’s too big for the space.

We have several options: (1) we could cut it down and make it smaller OR (2) we could add cabinets to the right of our pantry and a small countertop.

Option 1 would provide more space than the current size but it’s still less walking space than Option 2. It’s the least expensive way to go.

Option 2 would eliminate the island entirely and would provide a lot more open space for entertaining but then it would eliminate the island entirely. That’s just so hard for me to give up because I loved the idea of an island. But if it’s not enhancing the space, I can see why getting rid of it would be a good option. Another positive is that the new cabinet addition would have glass upper cabinets and we could put our wine glasses on display which would look really nice and would really complete the kitchen.

So, we’ve asked our contractor to provide an estimate for each option and we’ll make the decision from there. We’re leaning towards number 2 because it opens up the space more so we’ll see!