Painting & Texturing…In Progress

Wonder what’s happening in our house this week? Our formal living room and hallway are getting retextured and painted!! This house will finally feel more settled once this is finally done. Every time I walk through the front room, I’m reminded that we need to get it painted so I am SO happy that it’s finally happening. We’ve have blue swatches painted on those walls for months. Not to mention, our beautiful painting from our family friend has been patiently waiting to be hung up in the formal living room for almost 6 months now and it is time to put it on display!

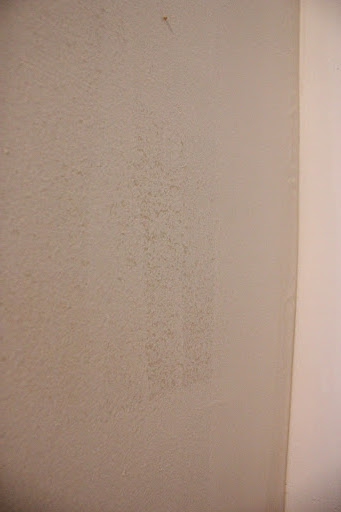
Why did it take so long, you might wonder? If you can remember back to May, I posted that I thought the room would get painted the following week (meaning 2 months ago)… clearly that didn’t happen. It’s been impossible to get our painter to commit to a date. Remodels, family emergencies, out of town… you name it, he’s said it. He is such a sweet guy which is why we waited for him (plus, we know he does a good job) but seriously, we were getting antsy. We would have painted the room and hallway ourselves but we really wanted it to get retextured. After the kitchen remodel, part of the opening was a different texture than the rest and, in the hallway, there was a lantern-like light that we removed and covered up. It was covered up nicely but that area was completely smooth while the rest of the wall had the funky 50’s style texture that the rest of the house has. Therefore, it was necessary that we evened out the walls and made it consistent.

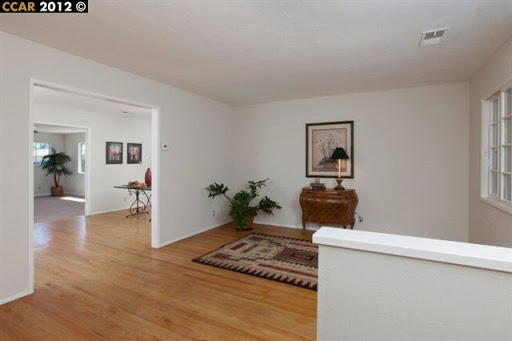
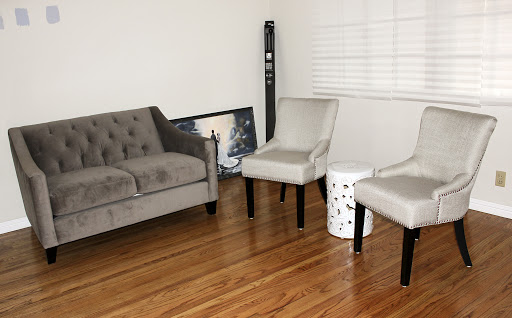
Here’s what the front room looked like on Monday (the day before they started work):

Okay, I lied that was the room on May 13 but it’s pretty close to how it looked on Monday. We now have a cute floor lamp in the room, but you get the idea. 🙂

Do you like our beautiful Cost Plus bookshelf? We were eyeing that thing for years! We just didn’t know we actually needed it until we bought our house and realized that a bookshelf would be perfect on that wall. It conveniently covers up the thermostat but has an open back so we can easily get to it to adjust the temperature. Plus, we love the design on the side of the bookshelf.

Here’s a recap of our checklist. I’m checking off the painting since it will be done in the next few days.

  • Loveseat
  • Side chairs
  • Side table
  • Buy a bookshelf for the wall to the left of the loveseat
  • Paint the walls a grayish blue
  • Hang our beautiful wedding gift (painting by family friend)
  • Buy the remaining furniture – end table, ottoman, and floor lamp
  • Buy an area rug
  • Pick out fabric for the curtains
  • Sew the curtains (task for my superwoman mother)
  • Hang the curtains
  • Get a plant to bring in some life
  • Hang pictures
  • Make/buy a piece of artwork to hang over the credenza

So there’s still a lot left to do but I will feel a lot better once the room is actually painted. There was another big change in the house this past weekend that we did ourselves (woohoo!) which I will hopefully post about soon. Just need to upload the photos. 

Cord Frenzy

When our entertainment center arrived, we quickly filled it with all of our electronics – cable box, video game consoles, internet router, etc. – but immediately noticed that the cord situation was out of control. Of course, it was good to get all of the materials off the floor (because that was driving me bonkers) but I knew that the cords needed to be covered up somehow. I don’t know about you, but I’m not a fan of seeing cords all over the place. I’m anti-clutter and cords everywhere is not my idea of clutter-free.

The “Before” with the out of control cords

We decided to do a mini-arts & crafts project to cover it up. We popped over to our neighborhood Jo-Ann Fabrics and bought one foam poster board and a yard of black fabric (to blend in with the back of the shelf.

I wish I took photos of the process but it’s so easy! Here’s what I did:

  1. Measured the shelves
  2. Cut the foam board to fit within the shelves (take off about a 1/4-1/2 inch from the height depending on how many cords to have, the cords will slide under the board)
  3. Cut a small triangle on the top of the board (this will make it easier to pull the board out if you ever need to remove it)
  4. Cut the fabric to be about 1 inch larger than the size of the board 
  5. Glue the fabric to the back of the board (I used regular super glue)
  6. Let it dry and BAM! You’re done
It literally took me about 15 minutes but made a world of difference. 
Here’s the final result! I didn’t cover up all of the cords but I was able to cover up the majority of them.
The “After”!

And zoomed out a bit:

Now we just need to figure out what to put on top of it! I’ve been doing research and there are so many cute ideas! Just need to find items that are a good price 🙂

Flashback Friday

One of the reasons why I love home improvement shows and blogs so much are because I LOVE seeing the before and after. It is soooo gratifying to see the difference!

Because of that, I knew that we needed to take “before” pictures of our house especially because we planned on making a ton of changes to the house. But somehow in the whirlwind that was our house buying/renovating/moving process… we never took any pictures. Well, I guess that’s not completely true, we did take pictures of the kitchen before it was ripped out but we didn’t take any pictures of the bedrooms, office, or living room until after the floor was sanded and we were painting the room.

I went on a hunt tonight to see if I could find the photos that were posted online when our house was listed and thankfully, I was able to find them online. Here’s what the house looked like when we first visited it:

Backyard

Another angle of the backyard (with the brick planter box that CJ had to tear out)

Guest bathroom (only change here is we have a shower curtain)

Guest bedroom (obviously big changes here)

The kitchen – can you believe the difference!??! 

Another view of the kitchen 
Formal living room

Another angle of the formal living room (that’s the front door)

Master bedroom (no changes here)

Master bedroom (clearly this looks completely different) 
Office

TV/Entertainment Room

I love looking at these photos because it reminds me how much we’ve accomplished in the past 6 months as homeowners! I can’t wait to see what other changes we make in the next 6 months.
Here’s a brief recap of what we’ve been able to check off our “to-do” list:
  1. Remodeled the kitchen – This is one item on the list but this was a 2-month project complete with choosing custom cabinets, buying appliances, choosing the hardware, buying the granite, picking out the sink, deciding on the layout, picking the wall color. Everything is brand new!
  2. Put baseboards in the entire house
  3. Sanded and refinished the floors
  4. Expanded the master closet to a walk-in
  5. Painted the kitchen, TV/entertainment room, office, guest room, and master bedroom
  6. Hung photos in the master and guest bedroom
  7. Ripped out all the plants in the front yard
  8. Ripped out the brick planter and hedges in the backyard 
  9. Furnished the house
  10. Started to decorate the rooms
  11. And so many more small things 🙂
Homeownership is not easy but it’s gratifying and SO worth it. 🙂

Guest Room Love

Since Day 1 (meaning since we put an offer on the house), I had a vision for how I wanted the guest room to look (thanks to Houzz.com*). We knew that we wanted a light and bright room to make it feel a bit larger and we wanted it to coordinate with my college IKEA bedroom furniture that we put in the guest room. After searching a bit, I found this inspiration and fell in love with it for the guest room:

Isn’t that gorgeous!?!? I just love the gray and yellow combination. It’s so simple yet inviting.

The white duvet cover was relatively easy to find. We first looked at Target and Bed, Bath & Beyond but the bedding at those two stores was unfortunately out of the price range we were willing to spend for the guest room. Luckily though, we made a trip to IKEA one day and found the perfect plain white duvet cover for approx. $30. We were so excited about the find and even more excited about the price tag!

So, as I said before, decorating the house really is a process. Below is a picture of the guest room on the day we moved in. I didn’t have the energy time to iron the sheets so I just laid them on top of the bed to give the illusion that it was made. I know, so sneaky. I would have fooled you if I didn’t tell you my secret.

Day 1 – February 10

As time went on, the room started to evolve more. We put the nightstand to the left of the bed, I ironed the sheets (GASP!) and finally put them on the pillows and duvet cover, and we bought a nice gray blanket to mirror the inspiration room. So that brought us to this:

Not winning any awards but still progress. That brought us to our latest project that I reference in my last post. We bought 5 frames at Aaron Bros (as I fondly call it) and wanted to do a nice little arrangement on the left wall. We also got an adorable lamp and pillows from Cost Plus and then BAM! We were ready to start making the room feel more inviting.

Step 1: Pick the photos & put them in the frames
This part is pretty self-explanatory. We chose a photo of the mother-son dance, father-daughter dance, my bouquet, me and the groomsmen, and CJ and the bridesmaids.

Step 2: Choose an arrangement
I saw a super helpful post on my favorite blog YoungHouseLove.com that talked about first doing the arrangement on butcher paper, sketching it out, and using that paper to help with hanging the photos. We decided that, since this was more complicated than the master bedroom, we needed the extra help.

So we bought a big roll of white paper (it was impossible to find butcher paper, for some reason), and rolled it out on the floor to lay out the arrangement.

Step 3: Trace the pictures with a pencil, mark where the nails should go, cut the roll of paper, and tape it up to the wall.

I swear, the squares are up there. If I were to draw on top of that so you could envision the arrangement, it would look like this:

Step 4: Mark where the nails should go in the wall by following the guides on the paper and nailing a small hole in each area.

Step 5: Remove the paper, find the small holes that we made, and nail it in!

Step 6: Hang the pictures!

Step 7: Admire your work 🙂

After we were done hanging the photos, we put the adorable pillows in the room and the lamp and Voila! We had an adorable guest room.

I now creepily walk past the guest room several times a day to stare at our work.

Here’s a close up of the lamp:

It has the gray and yellow to go with the color scheme and has a cute owl base!! Oh, I’m so in love.

Right now, the lamp is hanging out next to my bridal bouquet but we’re not sure if that’s the permanent home for the bouquet. I’m afraid someone will knock it off and then we will lose our wedding keepsake.

We still need some blinds, curtains, and a rug for the room. I also think we might get a bookshelf for the right side of the room; that wall is looking pretty lonely right now. But we’re content with how it looks right now! No need to rush through the rest of the enhancements. 🙂

*Houzz is an amazing source for decorating ideas so if you ever feel stuck on what to do with a room, I highly recommend going there. They have a great app and their website is super helpful too. You can create ideabooks for whatever floats your boat (I’ve created them by room, it’s easier for me to find stuff that way).

One Step Closer

Two weekends ago, my parents came over for dinner at our house and after my mom did her usual “inspection” of the house to see what’s changed, she turned to me and said, “You really need to start hanging some pictures.” Man, is that the truth! I knew that was the reason why we still didn’t feel fully moved in. I completely agreed with her so my goal for last weekend was to hang all the frames that we bought a few weeks ago.

First up, the master bedroom! I would have to say that the hardest part of hanging picture frames is figuring out what pictures to put in the frames. We went through a ton of our engagement and wedding pictures and chose three – one of us holding hands in our engagement photos, one of our wedding date from our engagement photos, and one of us holding hands on our wedding day. We wanted to keep it simple and thought that these ones were really sweet and romantic.

Hanging these frames wasn’t too difficult but it was a lot more difficult than the method we used in the guest room (to be talked about in a later post). The hardest part is making sure that you’re nailing everything in the right place especially since I’m a perfectionist and will notice if something is even a 1/2 inch off.

Here’s a before and after:

Anddddd here’s a close up of the photos above the bed:

One thing I’ve learned throughout this house process is that it really is a process. You can’t just move in and have everything set up and decorated the next day (unless you have superpowers). It’s really not possible and, even if it was, it’s better to take your time. It’s so much more gratifying to enjoy the process of picking out the decorative items and to see the house come together step by step. I LOVE seeing how one day the guest room is just a bed and then the next day, after just a few pillows, it’s a bedroom. (More on this in another post!)

And last but not least, CJ, my mom, and I participated in the Silicon Valley Kidney Walk on June 1 in support of our wonderful friend Sheila. Go Team Fred!

Chicago Recap

I can’t believe it’s been almost a month since our trip to Chicago! Time flies by when you’re having a blast 🙂

Chicago was a weekend filled with family, fun, and adorable houses (as I mentioned before). We had a late flight into O’Hare on Friday night so we weren’t able to see much of the city until Saturday.

On Saturday, we rode the train in and wandered around the city. We saw the “Bean”, Buckingham Fountain, the area where they have concerts in the summer (it was super cool looking! I just don’t remember what it was called), Millenium Park, ate deep dish pizza (a must), and went shopping! It was soo much walking so I probably should have worn walking shoes (story of my life). 🙂 

Here are a few pictures from our visit to Chicago:

Our ride into Chicago!

Had to take a photo in front of the tulips!
Millenium Park

The Bean!

Definitely experienced the “Windy City”!
Buckingham Fountain

Suzanne graduated from Wheaton college the next day which also happened to be Mother’s Day so we cooked a Mother’s Day brunch for our amazing moms and then proceeded to run off to the graduation festivities! The graduation was probably one of the best I’ve been to – it went by quickly and they had great speakers.

Hairdresser/paparazzi for Suzanne! Look at the focus!

We were so sad to go home the next morning but are grateful that we were able to make the most of the weekend!

Hello June!

Oh man, May really did a number on us. 3/4 weekends in May were spent traveling.

The first weekend, I flew to Las Vegas for a bachelorette party. The second weekend, we flew to Chicago for my sister-in-law’s college graduation. The third weekend, we went to a fundraiser for one of my coworkers in Fremont. The last weekend, we flew to NYC to visit one of our friend’s that lives in the East Village. Sooo much traveling but sooo much fun at the same time. I have to admit, I am SO happy to be home to relax, catch up on sleep, and work on the house.

CJ and I at the Natural History Museum in NYC
CJ’s one request was to see the T-Rex behind us 🙂

While I was in Las Vegas, CJ pulled out all of the plants in our front yard (which is a HUGE job). Our amazing neighbor helped CJ by tying the hedges to the back of his truck and pulling them out with a bit of horsepower. It definitely saved a ton of time! We’re so lucky to have such helpful neighbors.

It looks so naked right now but it’s going to look so amazing when it’s all done!! We had a landscape designer come over 2 weeks ago to look at our yard and do a mockup of the landscaping. We absolutely love what she came up with so now we just need to figure out when we’ll do all this planting. (Now’s the time that we would love a ton of volunteers to help us with this!! **Hint hint nudge nudge**)

Here’s what our yard looked like before:

Our house in February
And here’s what it looks like without all the hedges:
Our house yesterday 🙂
It’s so much more open without the hedges! We can’t wait to start planting and making the front of the house more cozy. In the meantime, we’re just excited we don’t have to accidentally walk through a spiderweb that appeared overnight in between those hedges.
Other than that, we’re slowly starting to get frames and decorative items for the house but it’s is a veryyyy slow process. We want to make sure we make the right decision for each item so we’re definitely taking our time.
I’ll try to be better about posting this month now that we aren’t traveling as much!! I’ll try to do a recap of our trips to Chicago and New York!

Inspired by Illinois Homes

We went to Chicago last weekend for CJ’s sister’s graduation from Wheaton College and not only did we have a ton of fun, but we also fell in love with the adorable homes! Not enough to move there, don’t worry. 🙂 But enough to motivate us to “leverage” some of their interior design ideas.

The house that we stayed at was built around the same time as our house and I loved how they worked with the quirkiness of a house built in the 50’s to make it cozy, adorable, and stylish. For instance, in the bathroom (one of my favorite places in their house), they had the most adorable doorknobs (probably from Cost Plus World Market or Anthropologie), bathmat, shower curtain, and decorations on top of the toilet. I took a few photos with my phone (I promise, I’m not a creeper) so I could remember what they had done.

Cute little decorations on their toilet. I love the little couple kissing. She said that she bought them in Sweden.

I should have taken pictures of the rest of the house but, since we were out allll day errrrday doing fun activities, it was too late to be starting a photoshoot when we got back. They also had a ton of adorable photos from their wedding and engagement shoot throughout their house which I loved. One of their frames was an old window and they put the photos in each glass pane. SO cute. I really should have taken a picture of that one. Here’s one that looks similar:

They had it propped on top of their mantel. That’s not an option for us since we have a TV over our mantel but I’m sure we could find another place or hang it on the wall just like the photo above.
Another house that we visited was built in the craftsman style to match the original houses from that era and it was sooooo gorgeous. 
I sent my sister several photos of their craft room because it seriously was unbelievable and so organized. CJ and I also took a few mental notes from that house.
CJ’s sister contacted one of her friends that has an interior designer as a mother-in-law and said that I wanted to tour their house (since she had been listening to me rave about the cuteness of the houses all weekend). Oh my, this one was soo cute too! We took several photos of their house for inspiration. Our favorite parts were their photo arrangements in the hallway, decorations in the family room, office, and master bedroom. Okay, so maybe their whole house was our favorite part. Unfortunately, they’re selling their house so they won’t be there for much longer. They’re moving to Santa Barbara (so exciting for them!) so they will be starting the decorating process all over again once they find a home there.
We got home feeling extra inspired and headed over to Cost Plus World Market to get some fun doorknobs for our hallway cabinet. The cabinet is a bit old and we’re not planning on replacing it anytime soon, if ever, so we wanted to spice it up. We decided on the ones below and installed them right when we got home. 
New (on the top) vs. old knobs
A close up – LOVE the design on the knob!!

It only took about 5 minutes to put them on. They were $4 each and make the cabinets look so different!! It’s amazing how such a small change can make such a big impact.

Finished product
Have you ever visited someones house and felt inspired to adapt some of their ideas for your house?

Living Formal

One of the most common questions I get when I haven’t seen someone in a while is, “How is the new house going?”, and I normally respond with, “It’s good.” When really, I’m thinking, “Well the packing is done. We have furniture to get for the formal room and then need to actually decorate the place – curtains, pictures, decorative pieces to go on the furniture, rugs, yada yada yada…” But I try to avoid bogging people down with the details. We have so many plans for the house that it’s hard to say that we’re done moving in when there is so much left to do to until it feels complete.

One thing that we can check off – major furniture for the front room! Last Friday, Macy’s delivered our adorable little loveseat for the front room. Our formal living room is starting to look like a real room instead of a big empty space that we pass through on our way to the kitchen that echos when we walk through it and I am SOOO excited about it.

Our painting is propped on the sofa so you can imagine what it will look like when it gets hung up

Once we moved the furniture in the layout that looked best, we could see that there was a void in between the two side chairs that needed to be filled. We saw a little Tibetan stool in Cost Plus a few weeks ago that I fell in love with but had no idea where it would fit in the house. After seeing the front room come together, I knew that it would be the perfect side table so we stopped by Cost Plus and snatched it up. I’m so in love with it because it’s functional but also is a piece of artwork.

With the cute little stool!
Let’s take a look at the “to do” list for the formal living room:
  • Loveseat
  • Side chairs
  • Side table
  • Buy a bookshelf for the wall to the left of the loveseat (should arrive in the next week or so)
  • Paint the walls a grayish blue (I think it’s called Rain Nation by Kelly Moore) – this is happening next week…hopefully
  • Hang our beautiful wedding gift (painting by family friend)
  • Buy the remaining furniture – end table, ottoman, floor lamp, and rug
  • Pick out fabric for the curtains
  • Sew the curtains (task for my superwoman mother)
  • Hang the curtains
  • Get a plant to bring in some life
  • Hang pictures
  • Make/buy a piece of artwork to hang over the credenza
Okay, so yes, there’s a lot left to do for this room but at least it now feels like a room. I love walking through that space now because I can now imagine what it will look like when it’s all put together. 

Setting Up the Guest Closet

Our guest closet has needed an upgrade for quite some time. Because we reduced it from a full closet to a half sized closet, it wasn’t set up for functional use when we moved in. We were using it for one of our hampers and for the ironing board but I realllllly wanted to hang up my coats in there. Up until now, I had them on a clothes hanger in the garage because there wasn’t enough space in the existing closets.

Here’s what the closet looked like before we spruced it up:

Ready for a fresh new paint job
Uneven painting done by our contractor

Step 1: Paint the closet. Although the picture above looks like a perfectly white closet, it was quite uneven and drove me nuts. Even if we filled up the closet with clothes, I would still know that the uneven paint job was hiding behind it. So, when CJ was on a business trip a few weeks ago, I painted it a standard white shade and voila! It was ready for shelves.

So fresh, so clean

Step 2: Buy the supplies. We went to Home Depot and picked out shelves and clothing rod for the closet. We chose the standard white metal so it blends in with the rest of the closet. The shelf came in a few standard sizes (none of which fit the size of our closet) so CJ asked one of the employees to cut it down to the size we needed and he did it at no extra cost. 
Step 3: Setting up the closet. We borrowed a handy dandy stud finder from my dad and started by finding where we could screw in the brackets. After that it was super easy: screw in the brackets, set the shelf on top, throw in the adjustable clothing rod and BAM. We had a working closet.

So functional